Daves Old Computers - Epson
Click any photo to view a large high-resolution image.
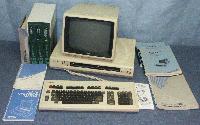 Epsons first personal computer, the QX-10 is an complete "turnkey" system
which shipped with Valdocs, a comprehensive (but slow) office package. It
can also run CP/M and TP/M which is an enhanced version of CP/M that handles
more memory (via bank switching), and integrated graphics. Here is a
look inside.
The Epson QX-10 was donated by Ian Cottrell.
 The back of the QX-10.
Left to right: Power, Light pen, Monitor, Option switches, Printer port,
Serial port, expansion slots.
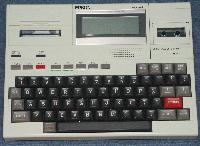 The Epson HX-20 is considered by many to be the first laptop/notebook
style computer. This little machine features a 4x20 LCD display, a printer
and a microcassette drive. It includes a machine language monitor, and Microsoft
BASIC in ROM. Additional ROMs can be installed for other applications.
Views:
Back,
Sides,
Bottom,
Inside.
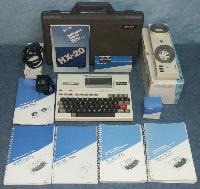 Complete HX-20 setup - Clockwise from upper left:
RS-232 cable, HX-20 carry case, Acoustic modem (with power adapter), HX-20 user
manuals, power adapter. Center: HX-20 with spare printer rolls and microcassette.
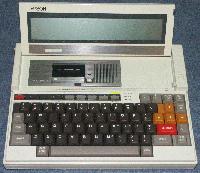 The Epson PX-8 is one of the first true portable laptop computers. It
utilizes a low power 8 line by 80 character LCD screen, and can run from
batteries. It has a Z80 processor, and runs the CP/M operating system.
Software is distributed on removable ROM carriers, and user data can be
saved to an internal micro-cassette tape drive.
An internal RAMdisk provides temporary file storage.
Here it is with the screen lowered, and the
keyboard cover in place. For it's time, this is
a very small and compact unit.
Epson PX-8s were donated by Jim Fare and Richard Parsons.
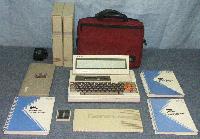 Complete PX-8 setup - Clockwise from upper left:
Power Adapter, Operations and CP/M manuals, Carry case, Wordstar Reference
and Training manuals, Introductory guide, ROM sofware in carry case,
Calc&Scheduler manual, Keyboard cover (with microcassette on top).
Center: Epson PX-8.
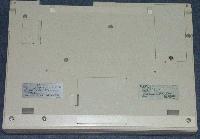 Bottom view of the Epson PX-8. The doors
provide access to ROM Modules, which are used
to add "instant" software to the PX-8.
Rear view: Left-to-Right: Audio connectors,
Expansion port, RS-232 serial ports, power connector.
Side views: Top: Left side showing reset buffer,
Bottom: Right-side showing contrast and power controls.
Inside view.
QX-10 Operations Manual (550k PDF)
HX-20 Advertisement (20k JPG)
HX-20 Quick Reference (12.5M PDF)
HX-20 Operations Manual (750k PDF)
HX-20 Memory Map (1.7M PDF)
HX-20 1983 BYTE review (400k PDF)
PX-8 Technical Manual (11.4M PDF)
CP/M version 2.2 Manual (0.5M PDF)
Z80 CPU Technical Manual (5M PDF)
Z80-CP/M emulator
Z80-CP/M simulator - boots CP/M
Back to Old Computers
Copyright 2004-2005 Dave Dunfield.
 Epsons first personal computer, the QX-10 is an complete "turnkey" system
which shipped with Valdocs, a comprehensive (but slow) office package. It
can also run CP/M and TP/M which is an enhanced version of CP/M that handles
more memory (via bank switching), and integrated graphics. Here is a
look inside.


